Quick Start
Once installed, follow these steps to start using Workspace Tasks:
1. Open a Workspace
Open a folder or workspace in Visual Studio Code that contains supported task files such as package.json, Makefile, build.gradle, or any other supported task type.
2. Open the Workspace Tasks View
You can view your tasks in two places:
- Sidebar (Activity Bar): Click the Workspace Tasks icon in the Activity Bar on the left
- Explorer Panel: Find “Workspace Tasks” in the Explorer panel; you can drag it to your preferred location
3. Browse and Run Tasks
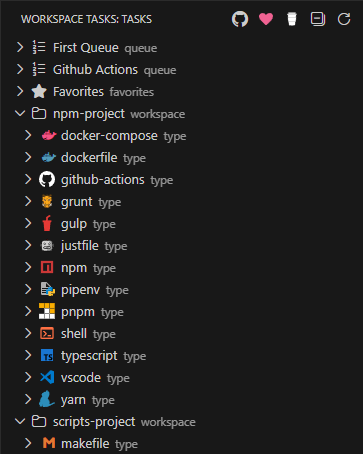
Tasks are organized hierarchically:
Workspace Folder
└── Task Type ← (e.g., npm, Makefile, Docker)
    └── Task File ← (e.g., package.json)
        └── Individual Tasks
To run a task:
- Double-click the task to run it immediately
- Click the play icon (▶️) in the task action bar
- Right-click for additional options
4. Add to Favorites
Click the star icon (☆) next to any task to add it to your Favorites. Favorites appear at the top of the task tree for quick access.
5. Create a Compound Task
Click the compound task icon next to any task to add it to a compound task. Compound tasks let you run multiple tasks in sequence—perfect for build, test, and deploy pipelines.
Tips for Getting the Most Out of Workspace Tasks
- Single-click a task to open its definition file (when applicable)
- Use the collapse button (⊟) to toggle view states:
- First click: Collapse task type groups
- Second click: Collapse workspace folders
- Third click: Expand everything
- Create
.tasksignorefiles to exclude unwanted tasks from your task list - Drag the Explorer view to any panel location (sidebar, panel, or floating window)
- Use Command Palette (
Ctrl+Shift+P/Cmd+Shift+P) to search and run tasks by name - Configure task discovery depth with
workspaceTasks.taskDiscovery.fetchDepthto improve performance in large repos